Order online or by
calling 260.407.2000


Softail Rear Fender
Print Instructions
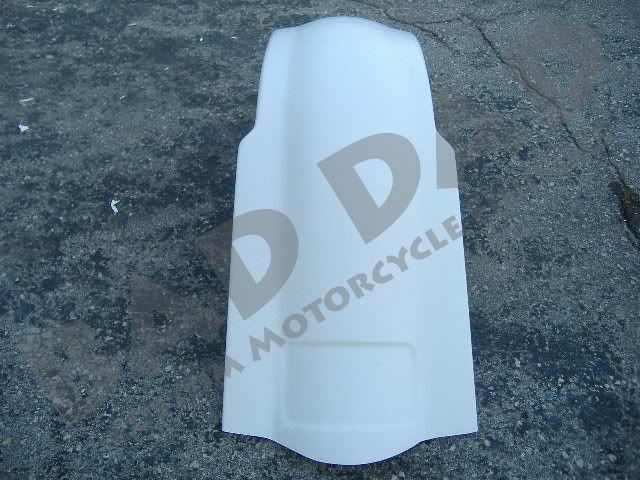
1) Bad Dad’s Softail Stretched Wide Rear Fender is a fender cover that is designed to install over the top of your stock fender. This Rear Fender is going to attach in two places: (1) the rear seat bolt hole from the two-up seat, and (2) an attached bracket behind the "bumper bracket."

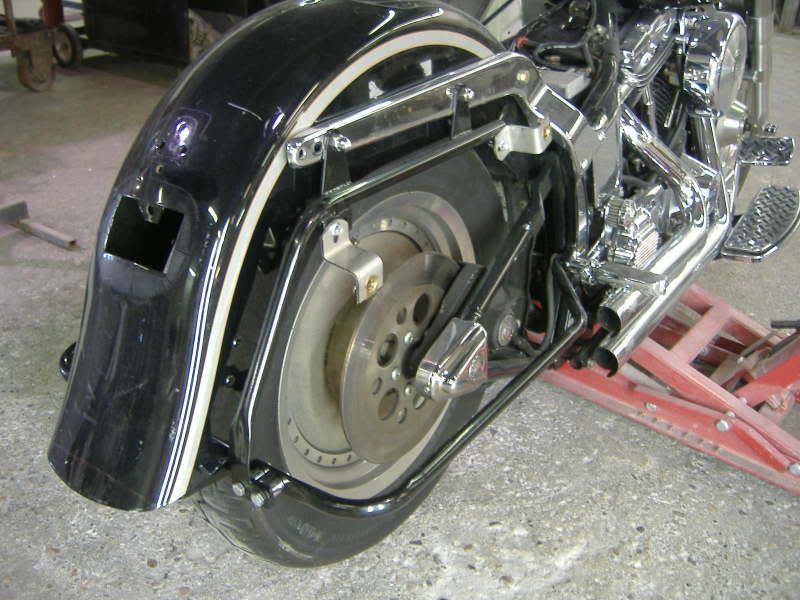
2) Begin by tearing down the rear of the motorcycle, including the seat, taillight assembly, and turn signals. For our bike, we are also installing a set of our Stretched Saddlebags, so we have already installed our Softail Saddlebag Bracket Kit.
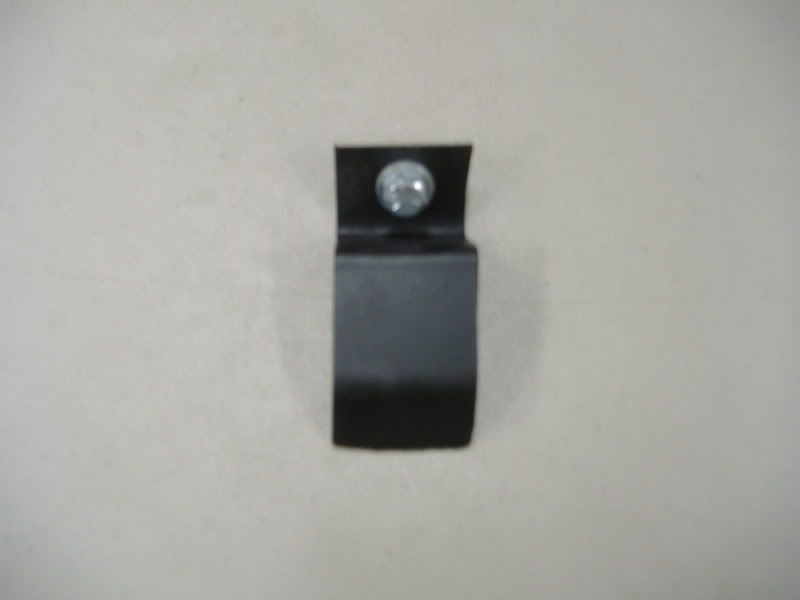
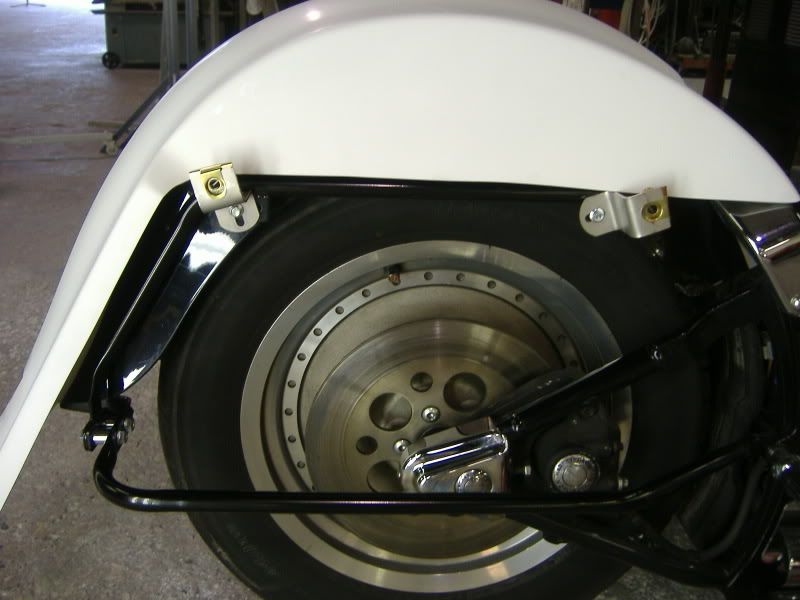
3) Before we install the fender, we will install an attachment tab to the bumper bracket from Bad Dad's Softail Saddlebag Bracket Kit.
If you are using a different Saddlebag Bracket Kit, you can still make a similar attachment. However, you may need to fabricate your own bracket, or contact Bad Dad about purchasing one from their kit.
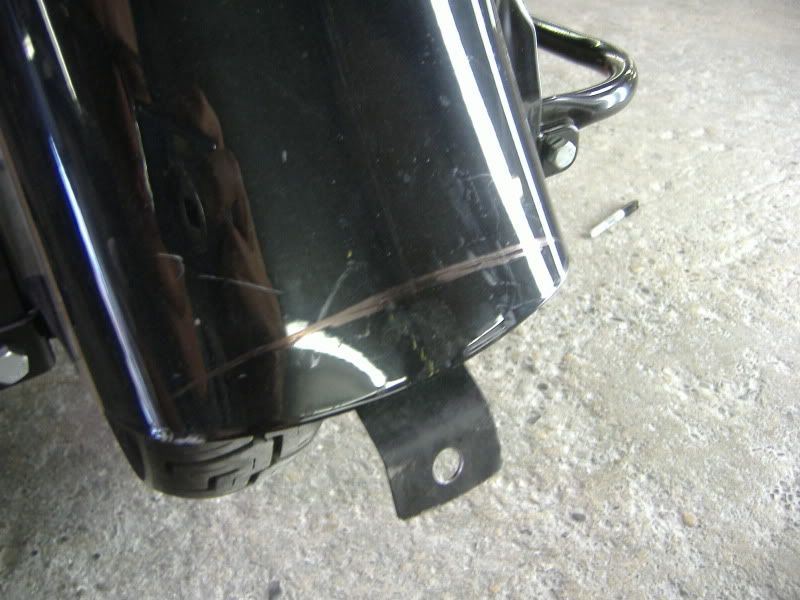
4) Install the attachment tab to the bumper bracket. When installing, be sure to place the head of the bolt closest to the tire in order to prevent the end of the bolt from potentially contacting the tire when the suspension compresses.
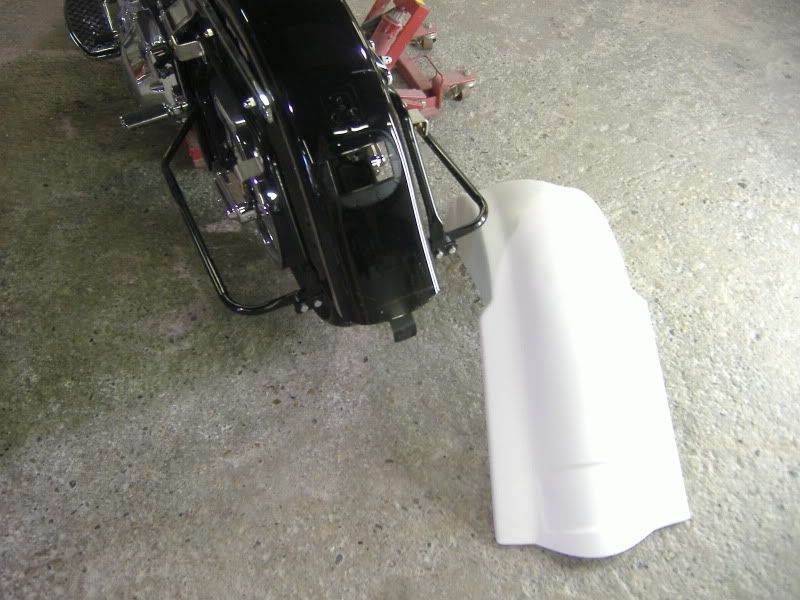
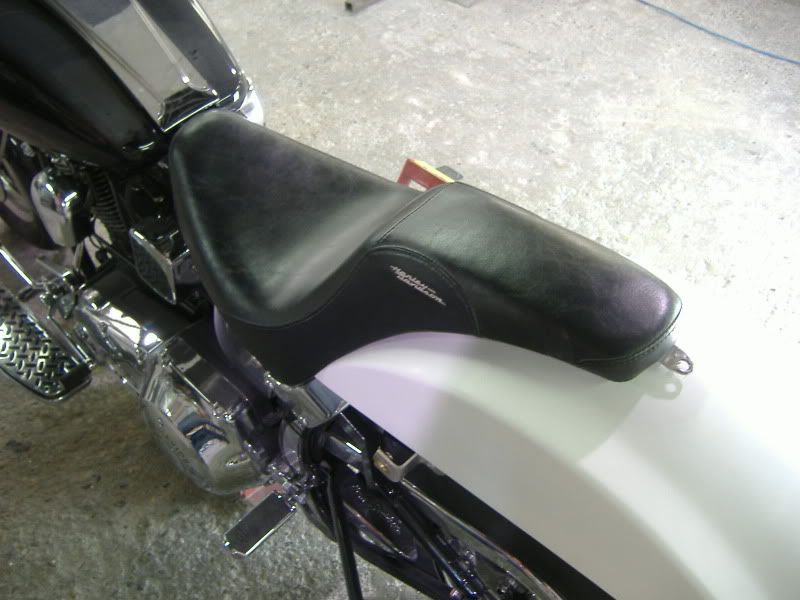
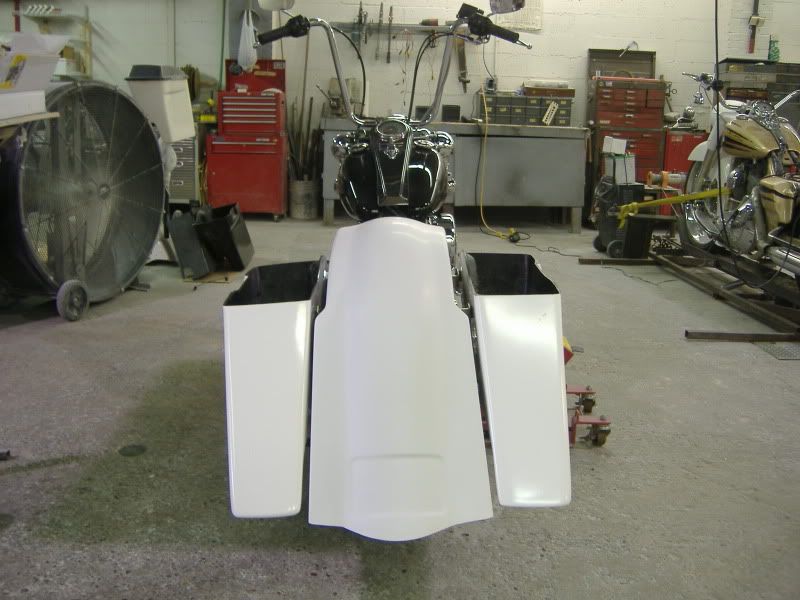
5) Now you are ready to set the fender onto the bike. Simply lay the Bad Dad fender over the top of the stock fender. You will find that there is a certain "sweet spot" where the fender rests the most comfortably over the stock fender.
6) Here is the fender sitting in place.
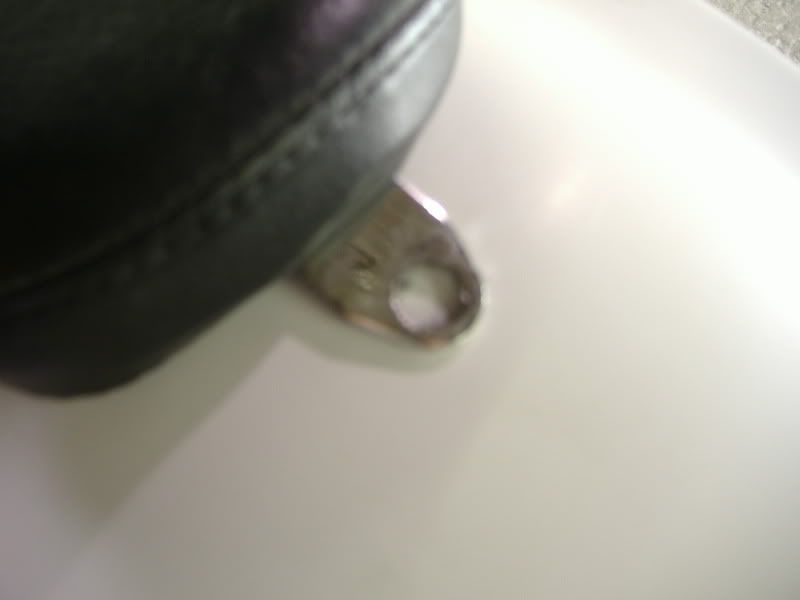
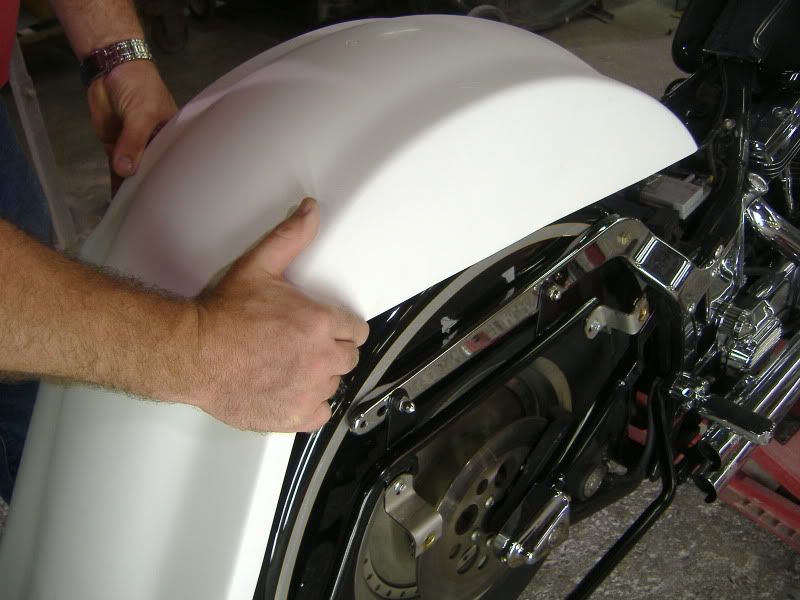
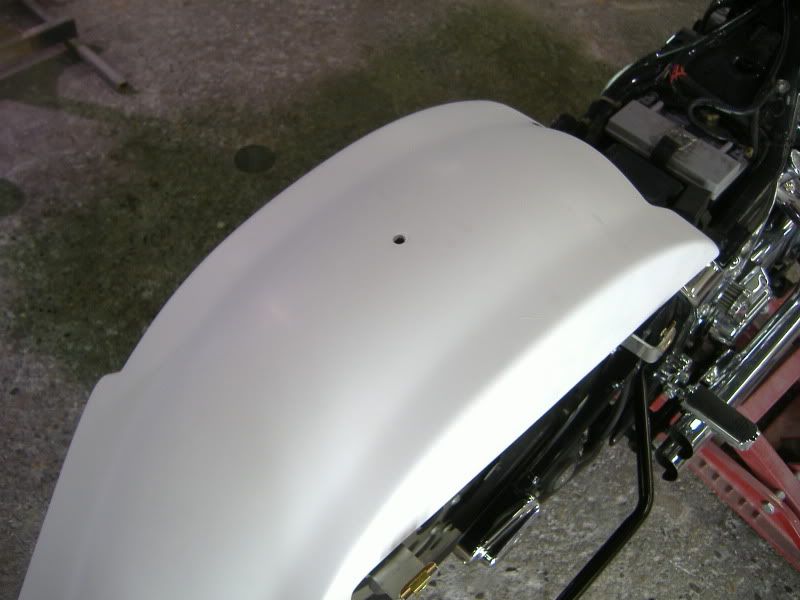
7) Next, check the location of your rear seat bolt hole. Do this by installing your seat onto the motorcycle and checking to location of the rear seat tab. The Bad Dad fender will also have a "scribed" circle in the fender, indicating an approximate location for this bolt.
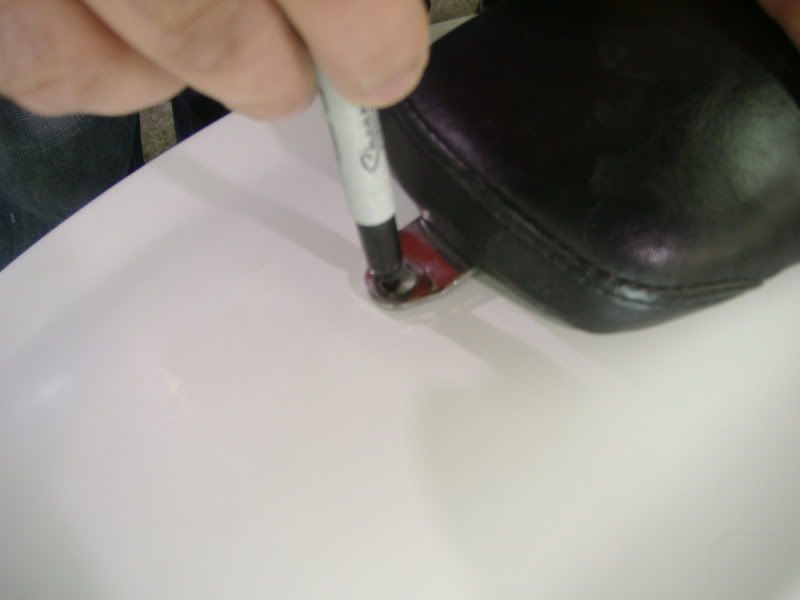
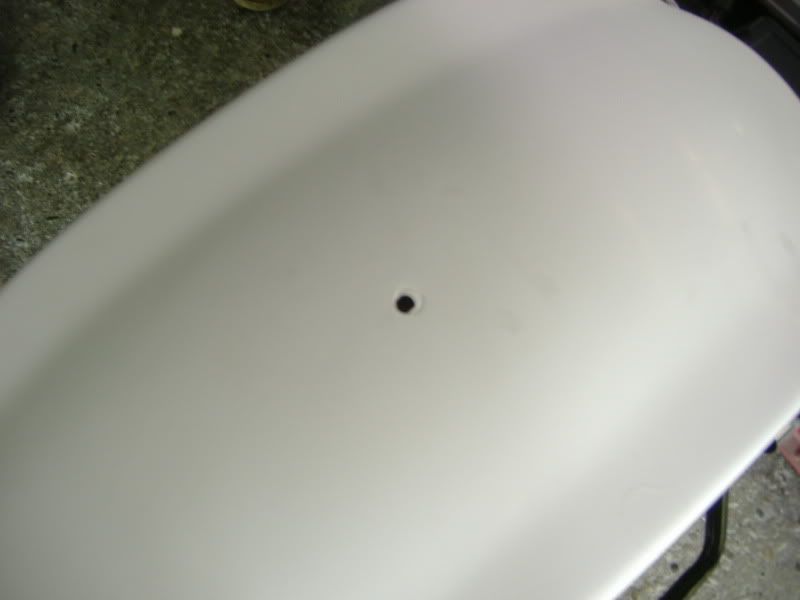
8) Mark the location of this tab with a marker. Before drilling the seat hole into the new fender, make a reference point on the bike to double check the location of the threaded receptacle in the stock fender.
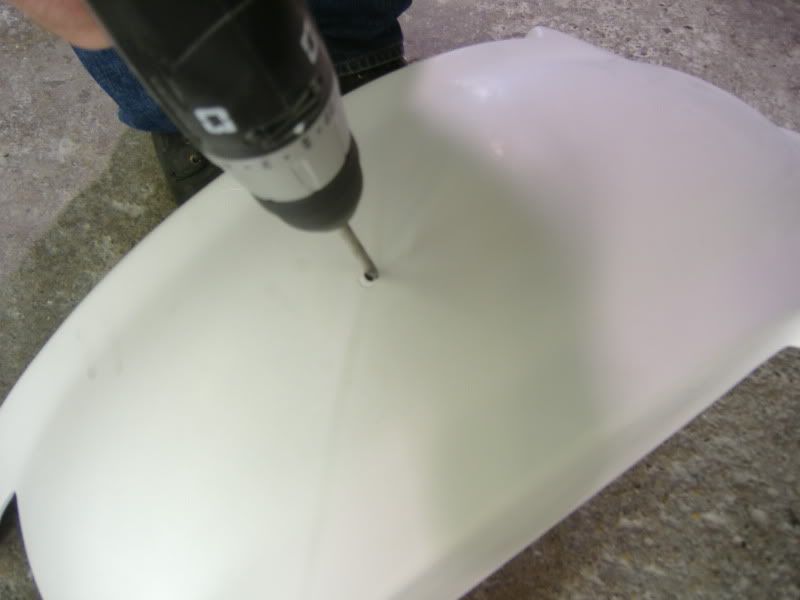
9) After the hole has been double checked, drill your initial hole using a 1/4" drill bit. Next, place the fender on the bike again, and check to make sure that your new hole lines up with the hole in the stock fender.
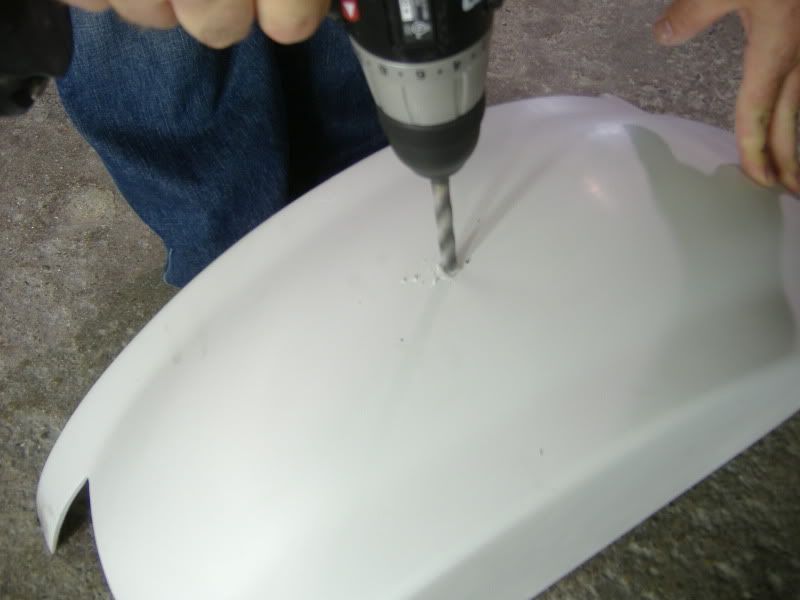
10) If your hole lines up properly, you can now drill out the hole using a 3/8" drill bit. If the hole does not line up, use this opportunity to make any adjustments.
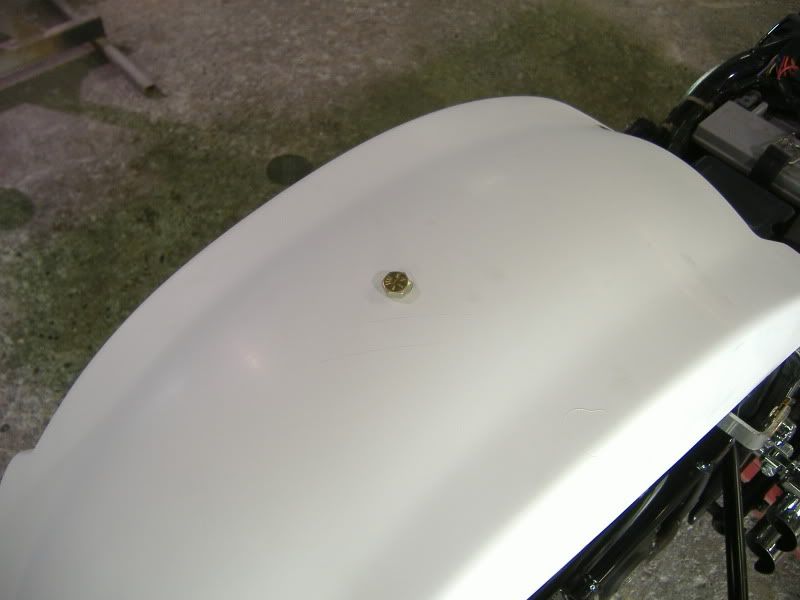
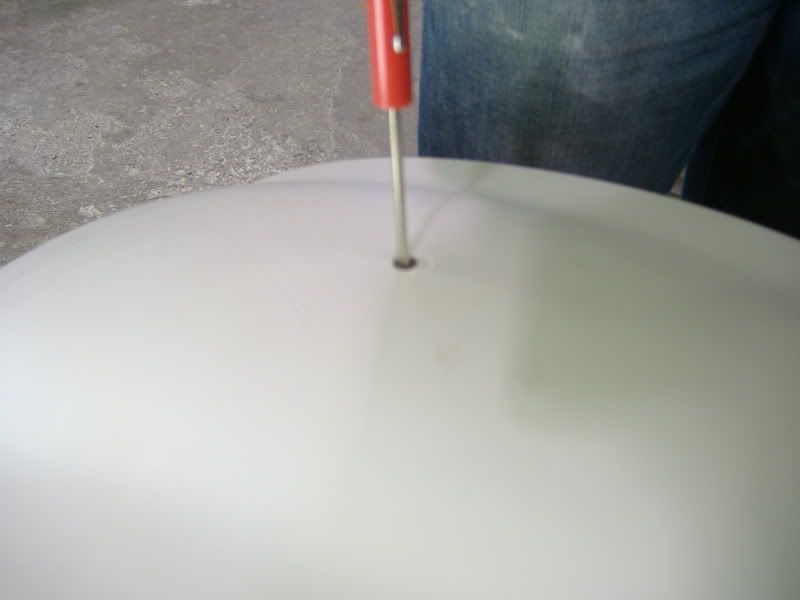
11) Now you can set the fender on the bike and use your seat bolt to hold the fender in place.
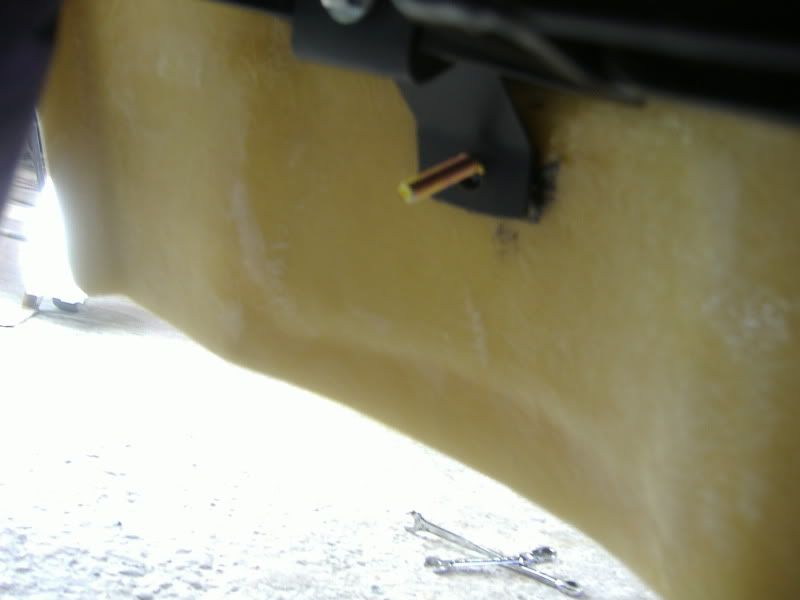
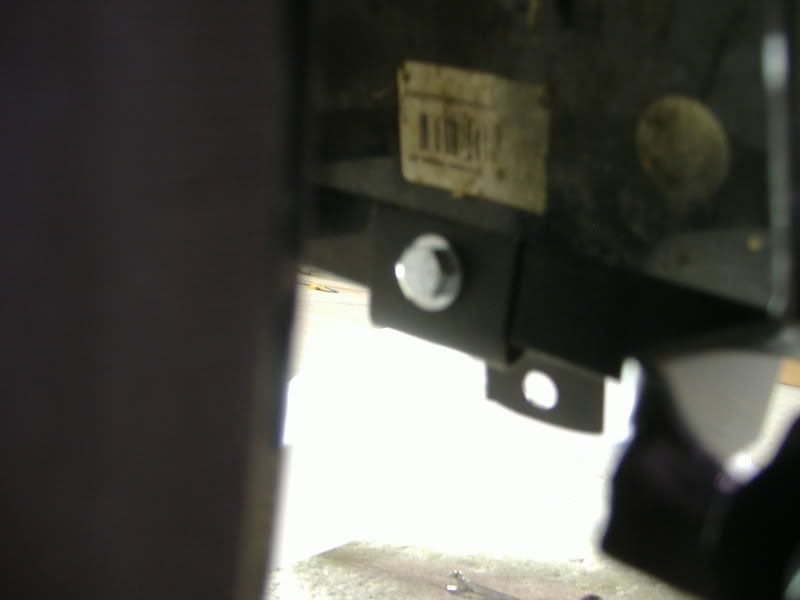
12) Next, you will make your attachment point at the bottom of the fender. Your Softail Stretched Wide Rear Fender already has a stud installed on the backside of the fender. Align this stud with the attachment tab you installed in Step 4.
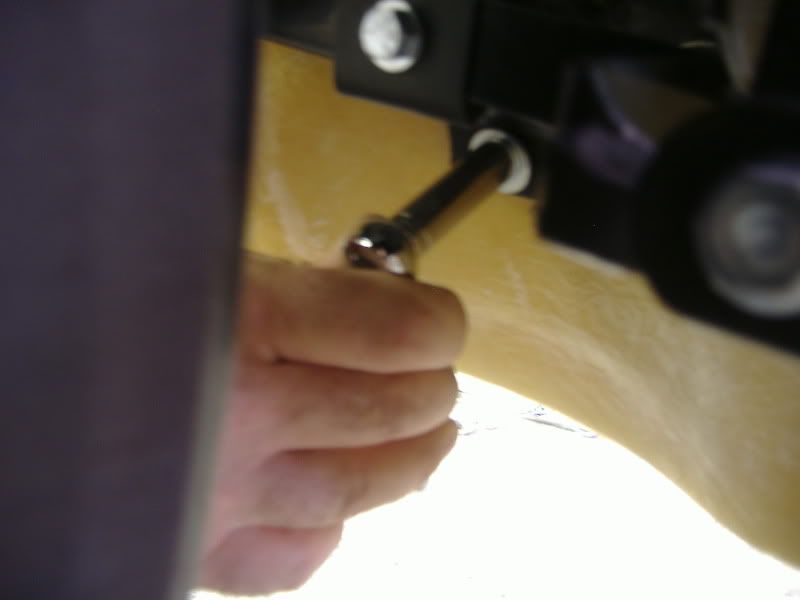
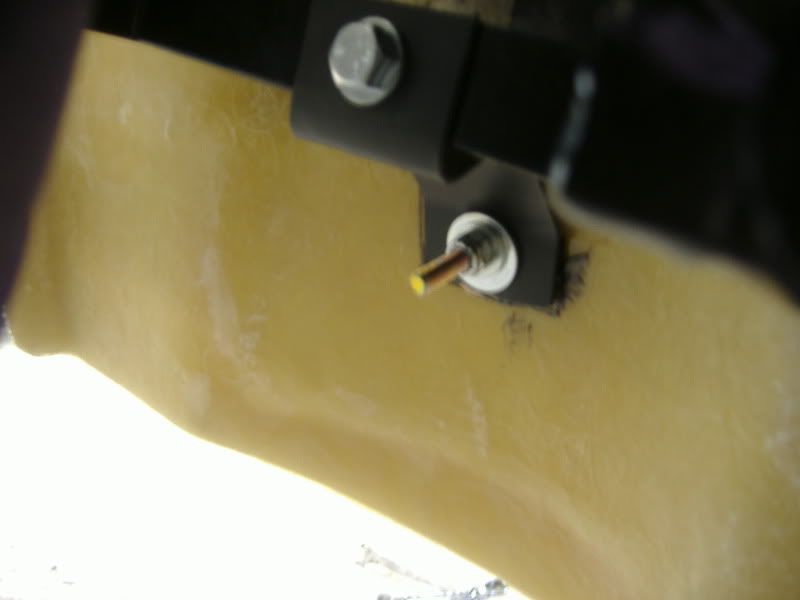
13) Now tighten the stud until it is snug.
Note: Do not over-torque this stud! This stud is for alignment purposes only. Tightening this stud beyond "snug" may pull the stud out of the fender!
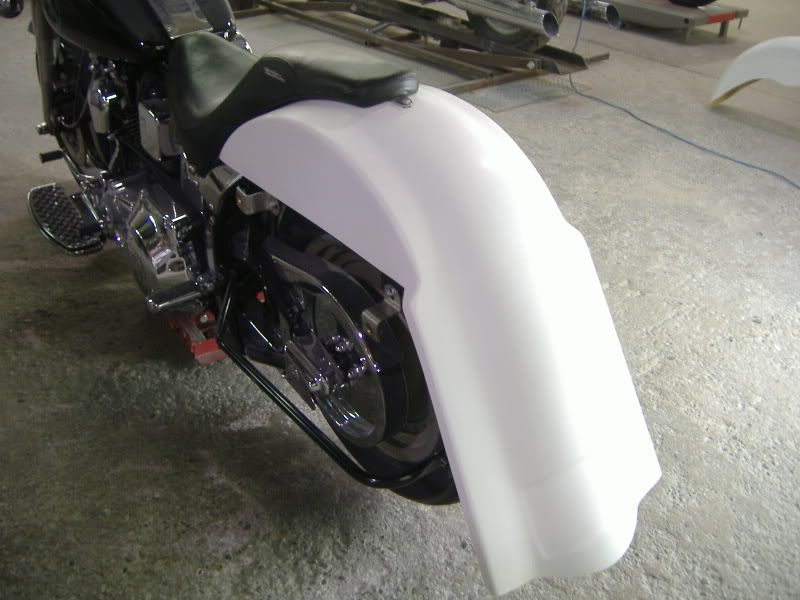
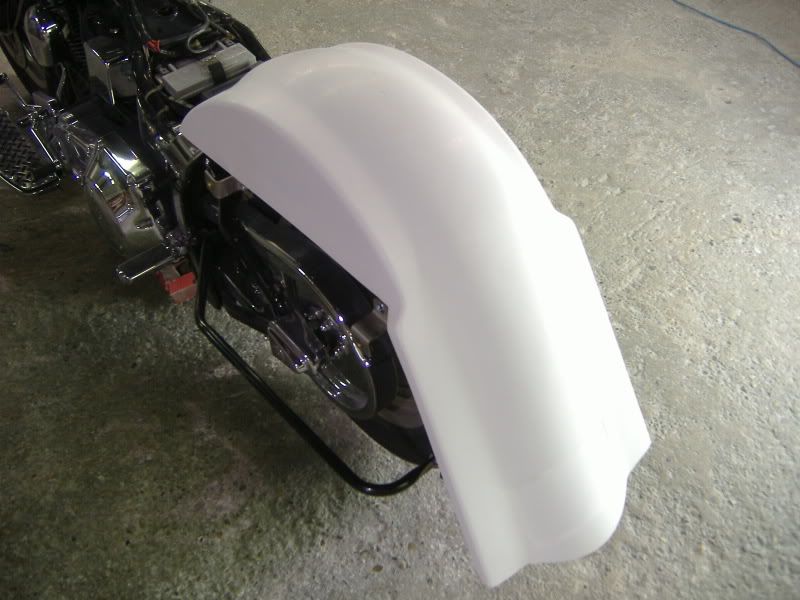
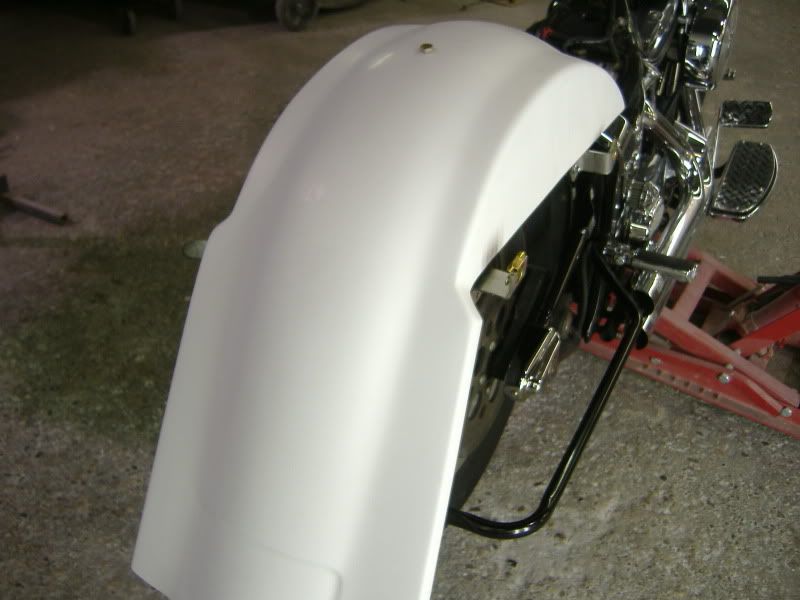
14) The Softail Stretched Wide Rear Fender is now installed.
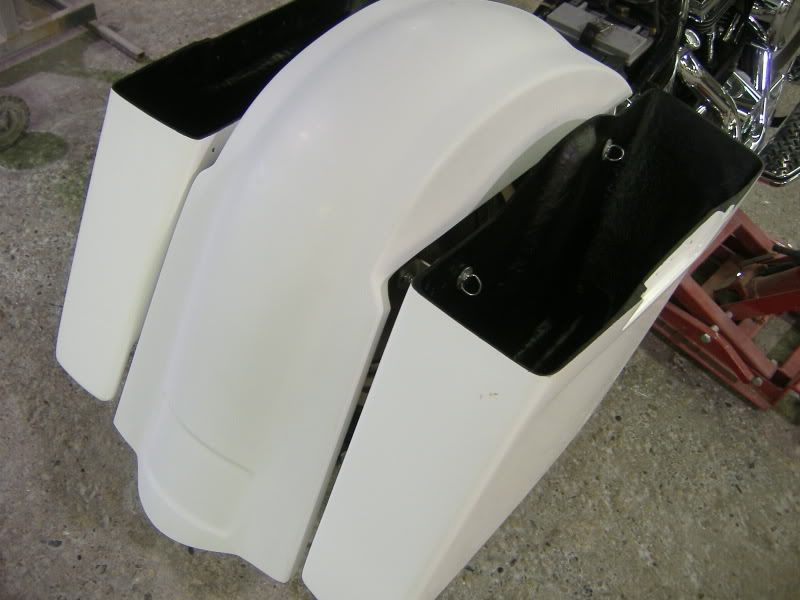
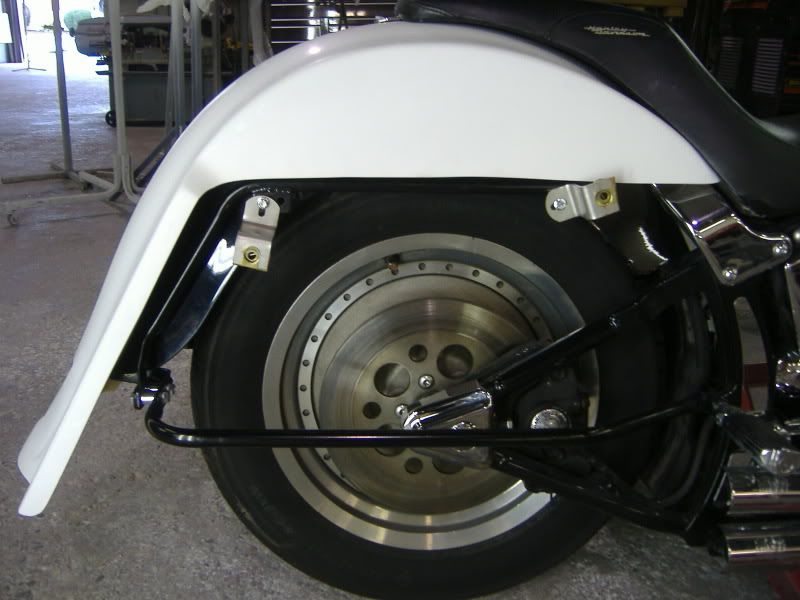
15) You will now finish by stalling your Stretched Saddlebags. This photo depicts the "gaps" between our Stretched Wide Rear Fender and Stretched Saddlebags after the initial assembly. However, these gaps are adjustable by loosening and re-tightening the upper and lower saddlebag rails. For the best appearance, plan to spend a few minutes with these adjustments in order to achieve the best gaps.
Sign Up for Updates on our Newest Parts, Current Projects & Latest Builds