Order online or by
calling 260.407.2000


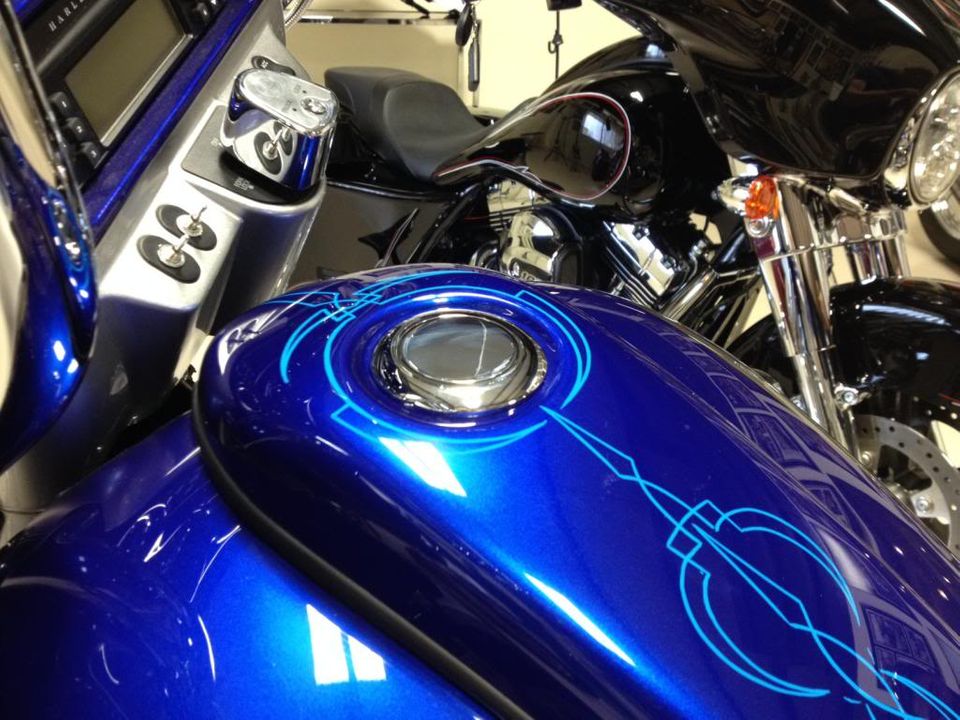
Competition Series Flush Gas Cap
Print Instructions
|
Bad Dad's Flush Gas Cap is a great way to improve the look of your bike's gas cap. These instructions show the quick steps to installing this custom part. |
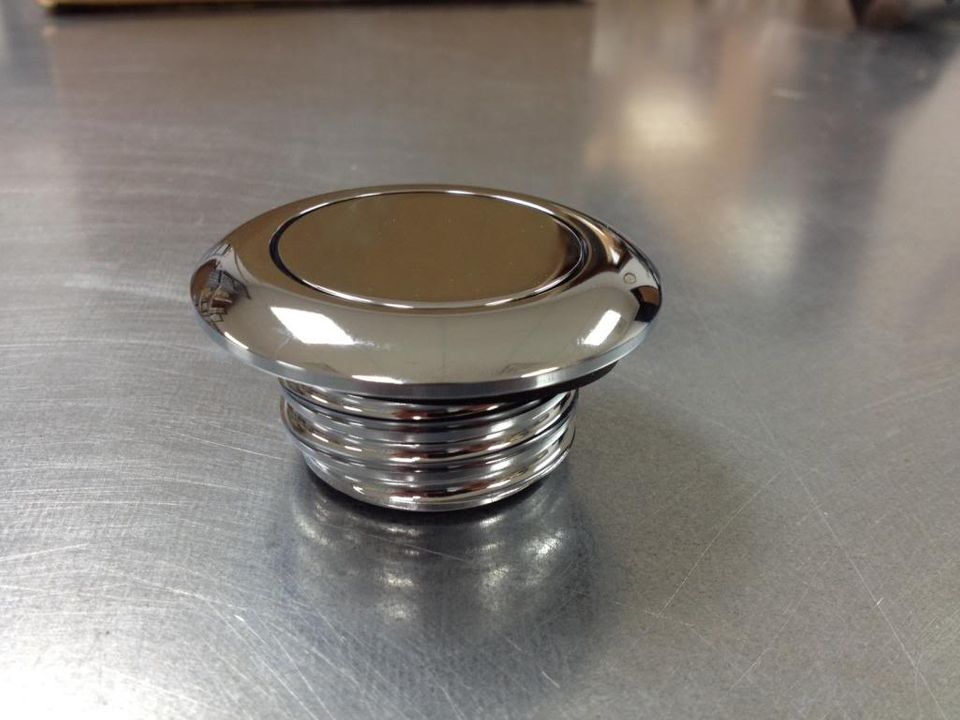
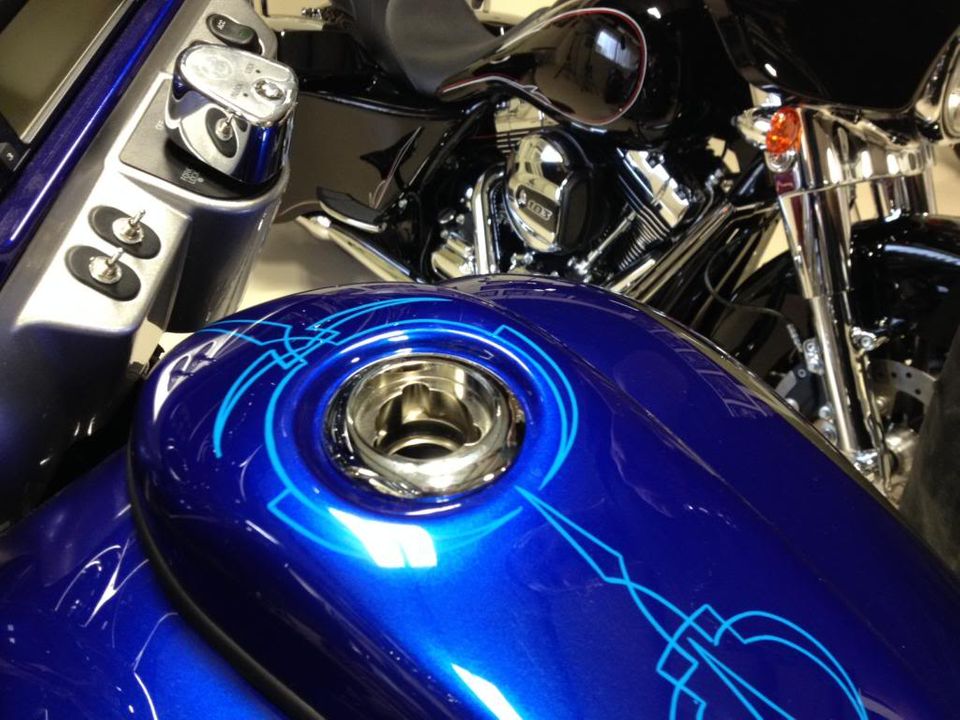
1) This is Bad Dad's Flush Gas Cap. The Flush Cap consists of both (1) the cap and (2) the trim ring. These two parts will be assembled together when you receive the cap.
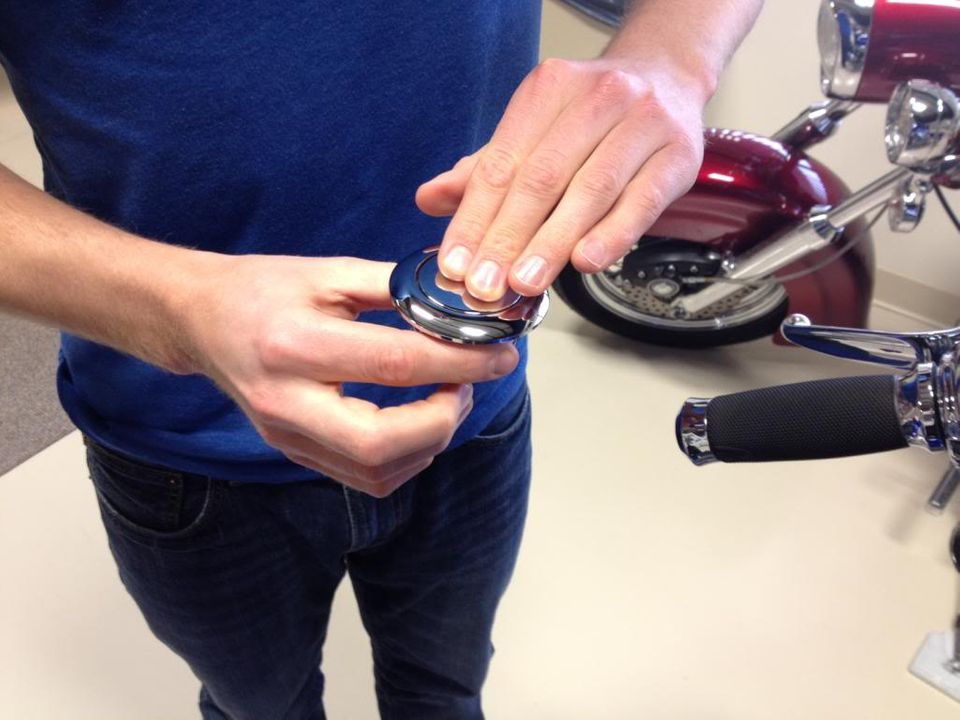

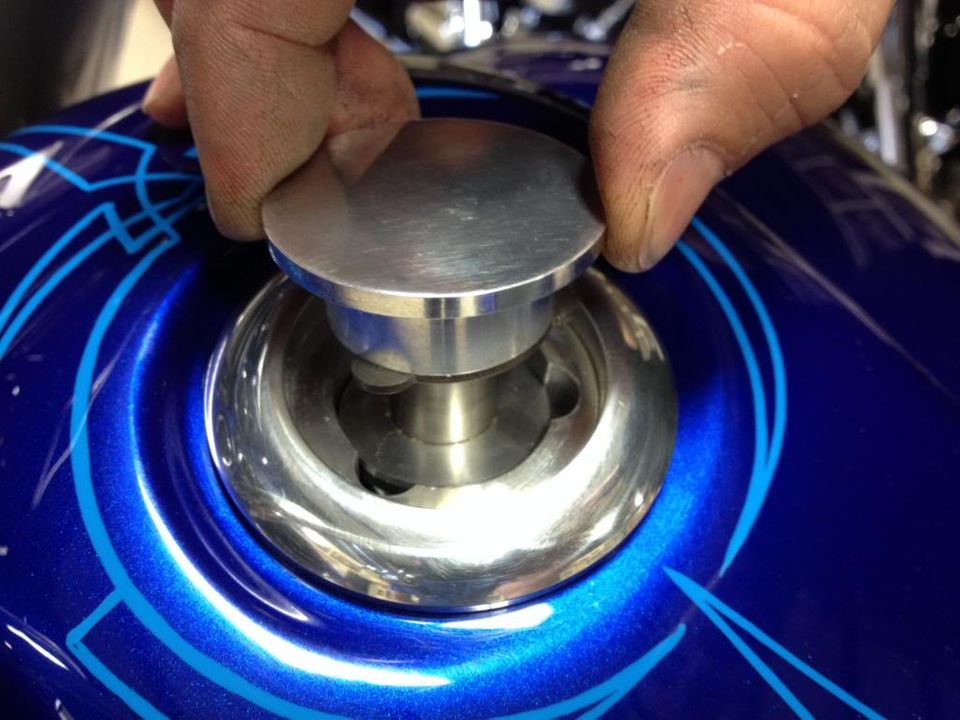
2) Begin installation by removing the cap from the trim ring. Do this by holding the trim ring, depressing the cap, and then spinning the cap.
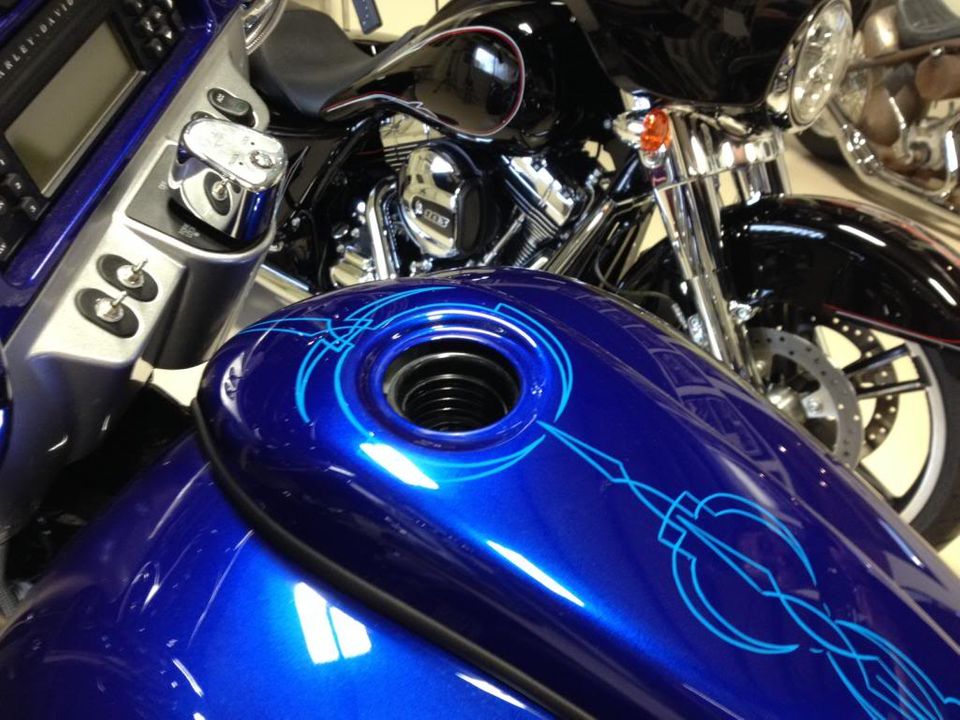
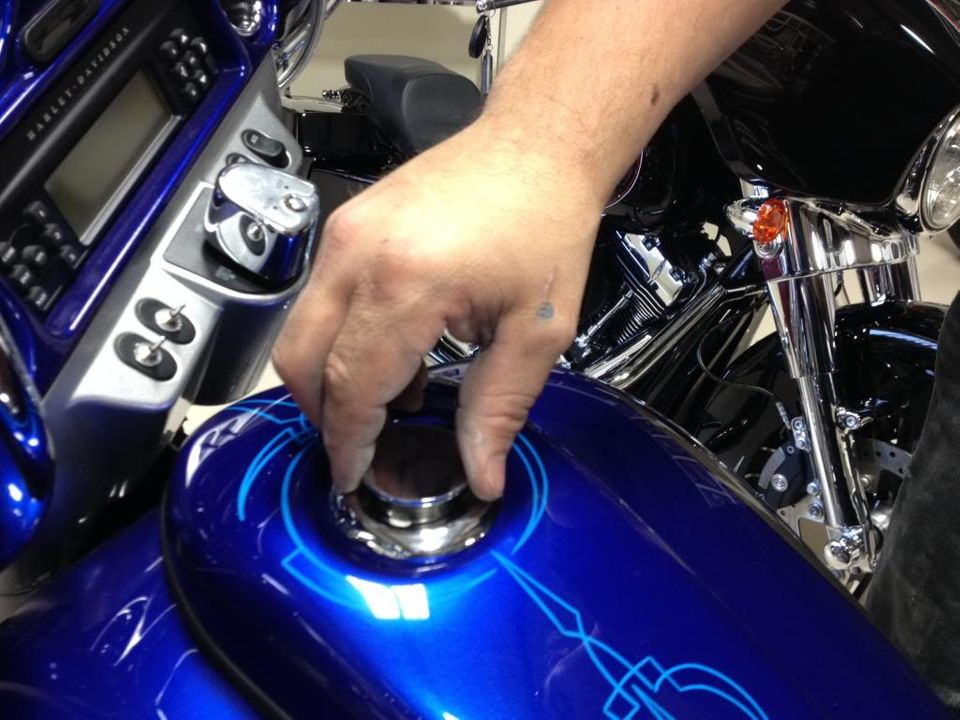
3) Next, install the trim ring into the filler neck of the gas tank. Thread this together by hand.
4) Tighten the trim ring by hand.
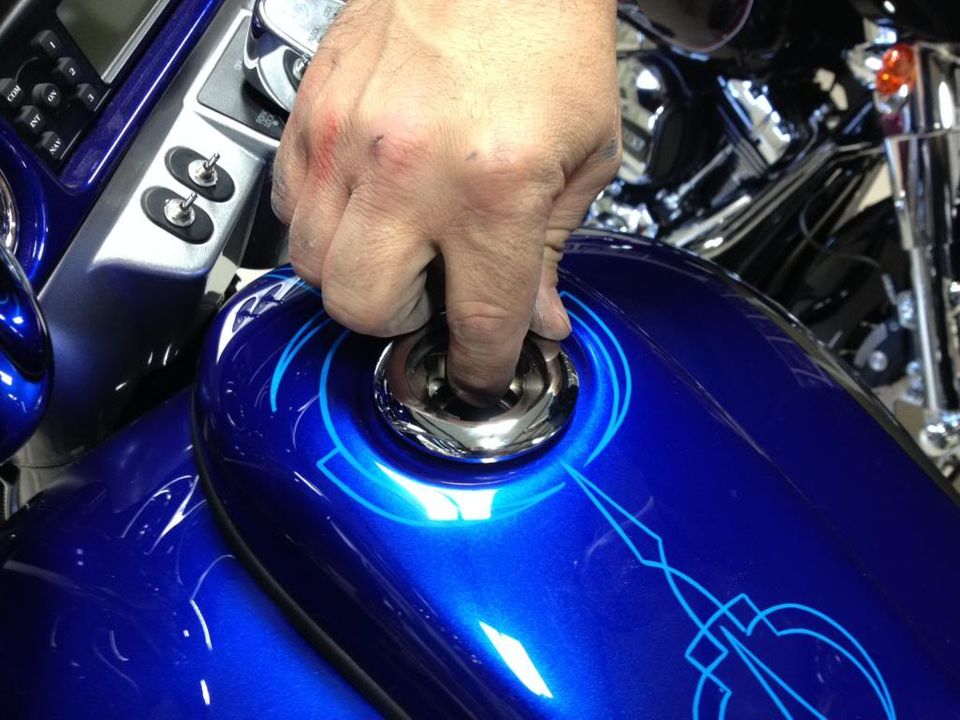
5) You will only be able to tighten the trim ring so right. Next, insert the cap into the trim ring. Align the three alignment tabs of the cap with the trim ring. Then use the alignment tabs to further tighten the trim ring.
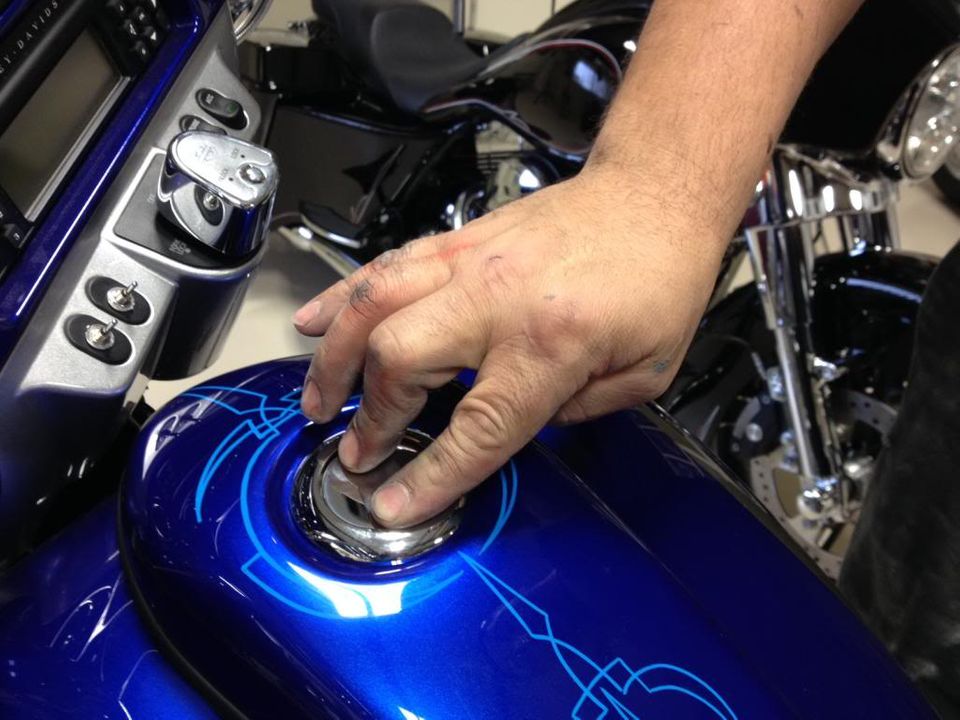
6) The trim ring is now secure. Insert the cap into the trim ring, depress the cap then twist to lock it into place.

7) Bad Dad's Flush Mount Gas Cap is now installed.
Sign Up for Updates on our Newest Parts, Current Projects & Latest Builds